Showing posts with label Elementary. Show all posts

How to Make a Cherry Pie and See the USA

I'll be honest, it's November... and I'm just now getting around to posting what the kids and I were up to over the Fourth of July!

Last year, we read (and LOVED) the picture book, How to Make an Apple Pie and See the World by Marjorie Priceman. So for the fourth, we couldn't wait to dive into Priceman's sequel, How to Make a Cherry Pie and See the USA!


This delightful book takes us along on the journey of a young baker and her little dog as they travel the United States in search of all the materials they'll need to create their own baking tools to make a cherry pie.

The book highlights a handful of states which was a great opportunity for us to learn about those states. To do that, I had a U.S. map on hand along with an atlas in which we read about each state the book mentions.


We also used this United States coloring book which I actually don't let the kids color in. : ) I make two copies of whatever page we're wanting to color (one for E, one for R), so that we can use the same coloring pages in the future. We'll be studying the states for years, I'm sure, to come!

A wooden puzzle map of the United States like this one is a really great toy to have around... and it was perfect for learning the geography and capitols of the United States.


We explored national landmarks and symbols too. First, to learn what a symbol is, we made these booklets bought here on Teachers Pay Teachers.


So the kids could play with some of our national symbols, I ordered these Supertoob USA figurines from Amazon. To learn all about them, we ordered the book O, Say Can You See.


Of course we had to bake a cherry pie!


And we watched several videos online while exploring this book, specifically to learn all about the various materials the book's main character was gathering across the United States to make baking tools like coal, cotton, clay and granite. Those links, along with many other ideas to explore this book, can be found on my Pinterest board.

It's November 20th... should I say Happy Thanksgiving, or Happy Fourth?!

Summer Reading - The Borrowers

We're in the first week of our summer break and to kick things off, E, R, and I are reading the imaginative, whimsical and beloved book The Borrowers by Mary Norton. It's the first in a series of Borrowers books and I'm especially loving it because along with E and R, it's my maiden voyage into the Borrower world!


During the school year, most if not all of the books we read (fictional and non-fictional) are both obviously and subliminally educational. They are Newbury and Caldecott Award Winning types of books with depths of historical, geographical, literary, relational and character treasures to explore. I LOVE these books. But I also love the idea of taking the opportunity that is summer to read through some simpler types of books. Not simpler as in less special. Not simpler as in less well written.

I'm talking about stories in which the goal of being engaged is exactly that. To be engaged. Not to necessarily try and glean anything in particular, educational or not, from the book. But reading for the purpose of enjoyment. Imagining the world the author offers, conjuring up images of the interesting, perhaps quirky or often memorable characters, laughing when something's funny, pausing when something's sad, wondering and questioning about why a character did or didn't do a certain something, placing yourself within the pages as your heart and mind allow.

This is an important goal, I think, for those award-winning books as well, those more outright educationally-minded stories we gladly engage with during the school year. But there's something about not having to learn anything from a book, including with your kids. But rather, existing together inside of it, just enjoying it, as you go.

With that in mind, E, R, and I have stepped happily into the Borrowers. Six-year-old E could read this by herself, but I wanted the adventure to be shared by all three of us so, for that reason, I'm reading the book aloud. Perhaps like your kids, mine need something to do with their wiggles while I read, so besides having quiet toys on hand for them to fiddle with (like legos, blocks, snap circuits and play-doh), I printed out these Borrowers coloring pages as well.

I also prepared an especially fun activity for them to do one morning as I read. If you know the story, you know that the Borrowers are tiny people who live under the house of "normal-sized" humans and everything they have - their furniture, food, clothes, etc. - is borrowed from the people who live above. So to give the kids an opportunity to engage with the book in a more hands-on way, they crafted Borrowers houses of their own!

All I did to prepare this activity was to gather a bunch of little things I had laying around, got out some glue and told them ready, set, go!


The brown boxes you see above served as the Borrowers' houses. I found them for a couple of dollars each at our local craft store. You could, instead, use a shoebox, you could tape some card stock together to make the basic shape of a room or house, really anything would work.

Some of the items the kids had to choose from included stamps (which, in the book, the Borrowers use as paintings on their walls), corks, spools, pom poms, bottle caps, feathers, paper clips, jingle bells, scrabble tiles, buttons, popsicle sticks, clothes pins, felt, yarn and ribbon. It was fun to watch what E and R came up with. Poms became chairs, spools turned into tables, clothes pins were seesaws, feathers served as beds. I loved to watch their minds and hands at work!


We still have half the book to go but reading with my kids - for the pure enjoyment of reading with my kids - is, I have a feeling, going to be the best part of summer.

If you've read the Borrowers, or decide to join us in their world, please do let us know!


Happy summer and happy reading!


Weather Unit

E, R, and I spent the last few weeks learning all about weather!


Our main curriculum for this weather unit comes from Moving Beyond the Page Ages 7-9. Moving Beyond the Page is our curriculum of choice and it's what we use for almost all of our units. It's meant for my daughter, E, who is 6, but my son R, who is 3, does many of the activities with us. I also almost always have what we call a "preschool book" that the three of us go through for him. We read and explore it for a week or two and sometimes the topic ties into our unit, as it does for this one.

Because this particular weather unit doesn't cover clouds, I chose Little Cloud by Eric Carle for R's preschool book.


It's a cute little story but doesn't actually give any information about clouds. For that reason, I had some other books on clouds from the library on hand that showed us the basics about clouds - what they are, how they form and the basic types of clouds. With the information gathered, E and R put together cloud books (shown above). I just stapled together some blue construction paper then, using cotton balls, had them make the three main types of clouds, glue one type on each page, write it's name, then on the fourth page, they got to make a cloud in the shape of whatever they wanted. Easy, inexpensive and fun!

Another fun ingredient I added to the mix was this cloud bingo game I bought for $2 on Teachers Pay Teachers. It's a pdf file I printed out, laminated and cut as needed. Then we used cotton balls (aka clouds!) as our bingo markers.


The last activity we did associated with Little Cloud was to cut out and use a cloud view finder similar to this one.


The Moving Beyond the Page weather unit (called Amazing Weather) taught us a lot! Including all about wild weather like hurricanes and tornadoes. Appropriately, the curriculum calls for you to read a short chapter book called Tornado as you work your way through the unit. It's about a dog named Tornado which, not having a dog or being familiar with dogs, was a good opportunity for E and R to learn some dog breeds. I used these 3-part cards for that. And, as I often do, I had some Toob figurines available for the kids to pair with the cards. I used these Toob animals.


Among many other things, the curriculum also taught us all about weather tools and even had us build a couple of our own - a wind vane and barometer. I was amazed that building the barometer, in particular, out of items we had around the house actually worked to measure air pressure!


I have so many other weather unit ideas we didn't get to on my weather Pinterest board. Feel free to check it out!
 

Down Down the Mountain

The kids and I just finished spending some time in the old and endearing book Down Down the Mountain by Ellis Credle.


It's the story of a brother and sister living simply along the Appalachian Mountains in the early 1900's. They've never had money for shoes, so they grow some turnips in hopes of selling them in town and making enough to finally buy some shoes. As they make their journey "down down the mountain," they end up giving all but one turnip away to people they meet in need. And you'll have to read the book to find out what happens next!

As I've learned from the wonderful book workshop company LitWits (which, if you haven't already checked out, you should!), books are especially meaningful for kids when their senses are engaged. Which is what, as usual, I tried for. So here's what we did!

After reading the book for the first time, we looked into where the Appalachian Mountains are using a map (shown above) I found for free online and printed out. To learn a bit more about mountains in general, we also flipped through these mountain nomenclature cards and played around with these mountains 3-part cards which taught us the five different kinds of mountains and gave real life examples of each.


We also had several books on mountains sitting out. And the poem you see in the photo above is called General Store by Rachael Field which I printed out since the kids in the book visit an early 1900's general store.

Down Down the Mountain was also a great opportunity to visit a local farm with some friends and see firsthand how fruits and vegetables (including turnips!) are grown.


E, R, and I also talked about the difference between fruits and vegetables (anything with a seed is a fruit!). And we reviewed the food pyramid by sorting various kinds of foods into groups. We used some wooden food we had on hand for that, in addition to this sorting activity found on Twinkl. (The poem, Cauliflower Fluffy, shown below, can also be found there.)


The kids in the book ate cornbread, and although my kids had already had cornbread, I bought some at the store (baking is not my biggest gift!) for us to nosh on.


Here's what our Down Down the Mountain setup looked like:


Feel free to check out my pinterest board for lots more Down Down the Mountain ideas!

Interactive Spring Display

I decided to kick off Spring with an interactive display in our school room. I wanted the kids to be able to play, discover and learn... and here is what I included!


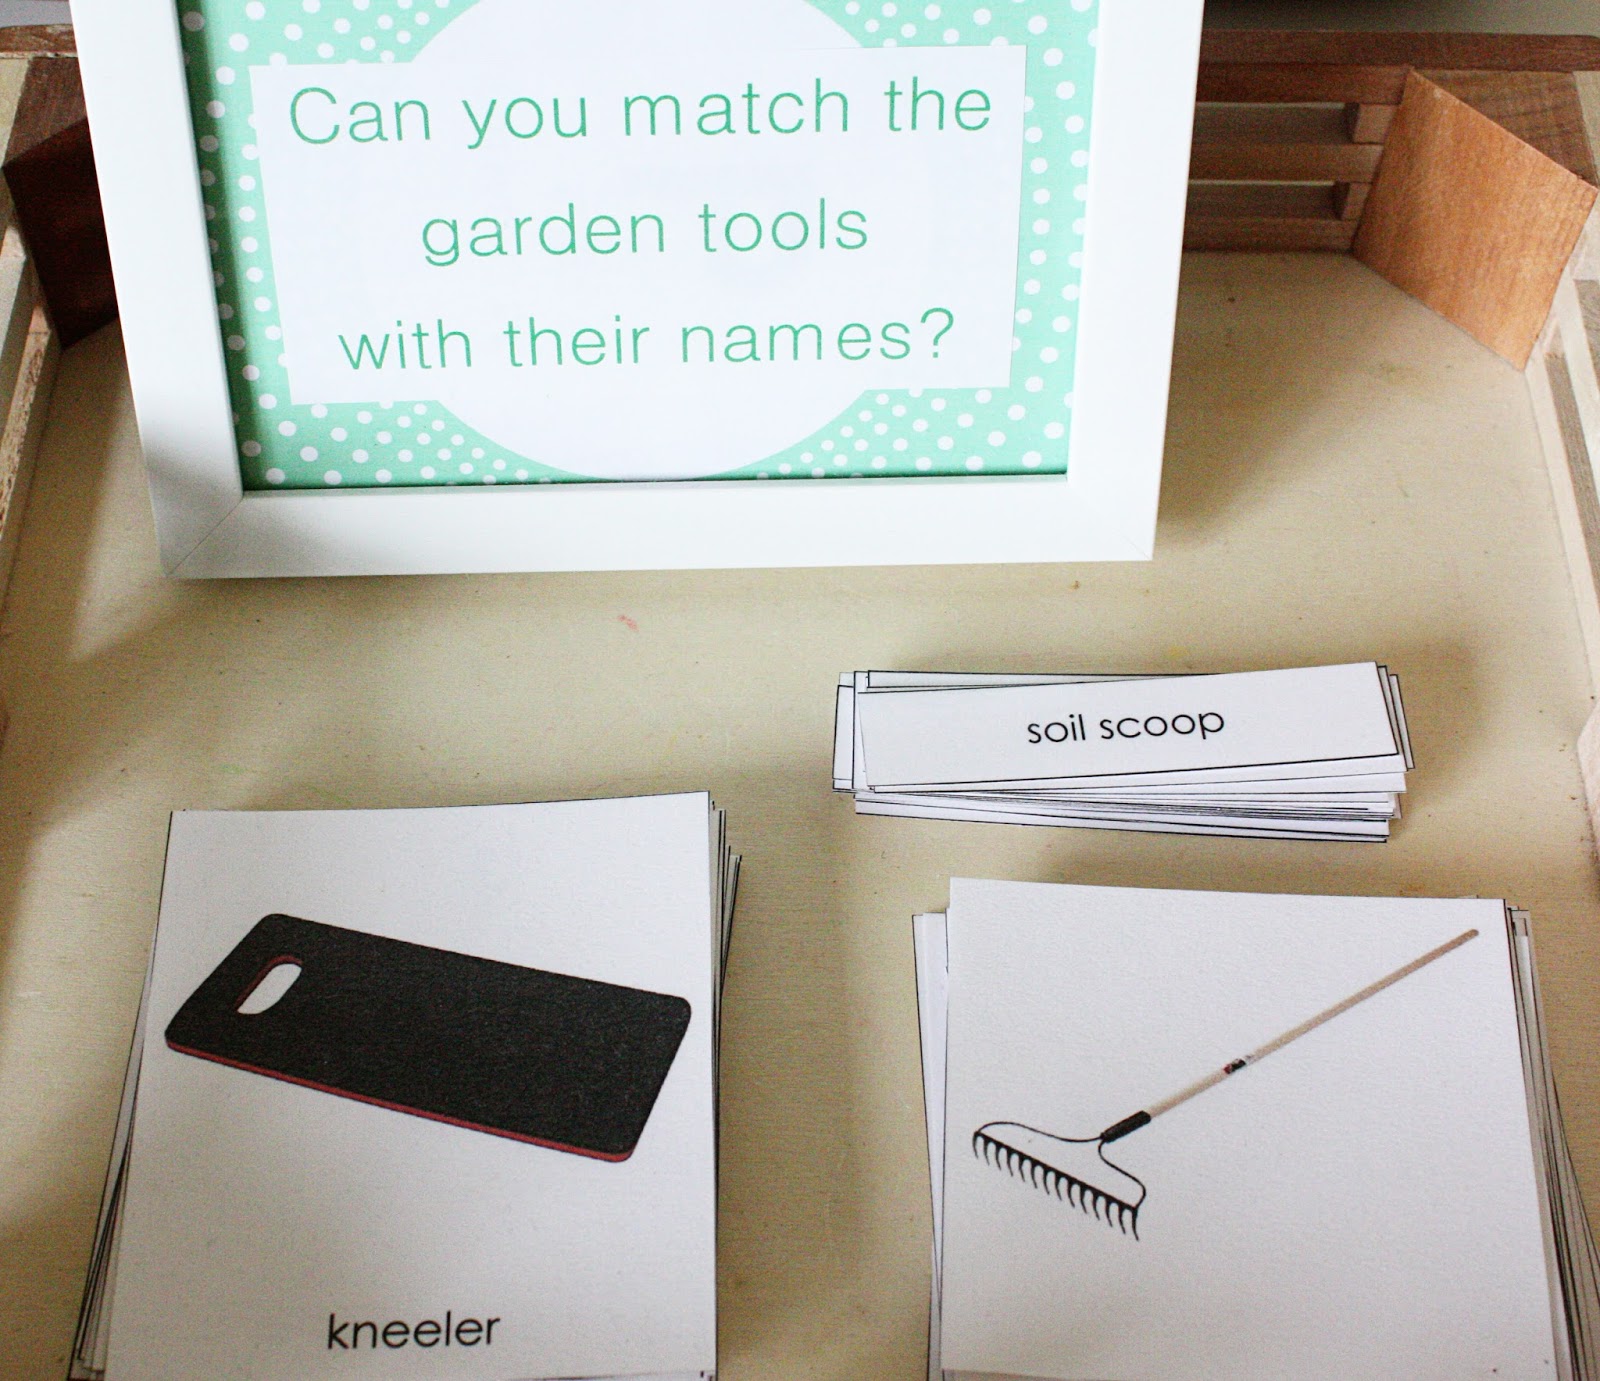
We don't have a garden, but I wanted E and R to see and become familiar with garden tools. They had a good time doing that with these FREE 3-part cards.


 I also thought they would have fun identifying various flowers. I love Toob, so I got these flower figurines to match up with these flower 3-part cards.


Last year, I purchased 3-part cards for the kids to learn the anatomy of flowers, leaves, roots and seeds so I had those out as well. But this year I added these Montessori botany puzzles which are kind of pricey (around $70 on Amazon) but it was a splurge and I know we'll get a lot of use out of these puzzles over the years.


I also wanted E and R to see the process of a plant growing. For that, we used this Sprout and Grow Window which allowed the kids to plant bean and pea seeds then watch as all the parts of the plant began to grow.


I also had out flower and leaf rubbing plates similar to these. And a handful of books about trees, flowers and spring.


We've taken a few nature walks as well and the kids each brought along a notebook with blank pages to draw or write about anything that stood out. We collected flowers on those walks as well and used a flower press to press them, then we glued them in their notebooks.

What do you like to do with your kids in Spring?

Finishing Strong

We have 6 more days left in this school year and as we're wrapping up, I, perhaps like you, have a big desire to finish strong. As I've thought over the past few days what that means for us, finishing strong is taking a different form than I originally thought that finishing strong would mean.

My initial thoughts landed along lines like these:

"Before the end of the year I really want to get to the end of our math curriculum."

"I really want to wrap up this unit. No loose strings!"

"I want to end the year somehow feeling like the kids learned a lot and, going into the summer, are all filled up with the various kinds of school-like stimulation I know they want and need."

Etc., etc.

But the more the idea of finishing strong has stirred inside my mind, the more I'm finding that, for me, finishing strong is less about the doing... and all about the being.

What I really want my kids to feel at the end of this school year is that they are known... and that they are loved. Can that happen while running around, trying to pack in the remaining pieces of our curriculum before the end-of-the-year school bell rings? Perhaps in some families. But not for me.

Maybe like you, I can only focus on so much. They say that women are natural multi-taskers. Not me! The less I have on my radar, the better chance there is of my doing something well. So for the next week, I'm actually paring down what the kids and I are doing, and instead of cramming the last pages of our various curriculum in to these next several days, I'm playing on the floor. I'm pulling out the legos, I'm grabbing our wooden blocks. I'm hanging out with my daughter at the piano and playing police and Rescue Bots and jumping on the trampoline. We are reading our Bibles together, and taking the time to talk about what stood out. We're pausing, we're thinking, we're living together inside of unplanned moments and experiencing our hours without a single academic expectation.

And all the while, I'm looking in their eyes. I'm studying their smiles. I'm exploring their expressions and delighting in their laughter. Which is different than letting our school year peter out. It's not about becoming lazy. Admittedly, amid my aspirations to finish the school year strong, there's a part of me with senioritis. "Ahhh... we're near the end. Let's just coast because who cares what else, at this point, we get done?"

The truth, you more than likely know, is that getting down among our kids, existing at their height, imagining at their age and playing along with their often well-worn jokes and hobbies and favorite games, is often a whole lot more exhausting than pushing forward in school.

But I want my kids to know, if nothing else over these next several days, that I see them. That I know them. That I want to know them more. And that, no matter what, they are right now, they are always, loved.

Of course this is my desire for them every day. But for now, and for me, this is what it means to finish strong.


Natural Materials Outdoor Play


My friend Hayley Brentmar is one of the most creative people on the planet. She's a fellow homeschooler to her adorable 6-year-old girl and heart-bendingly cute 3-year-old twin boys. And though I could tell you hosts of things I love about my friend, including all the many ways in which she inspires my own creativity, today I'd like to tell you about her backyard. Actually, she's going to tell you about her yard. I asked her to write a guest post, specifically about creating an outdoor play space with natural materials. You won't believe what she's done with her home. I know you'll be inspired, as am I!

From Hayley:

The weather is warming up and it's time to get outside and play!


One of my hopes for my children has always been that they experience the joy of having a dreamy place to play outside. More specifically, I’ve always wanted them to have a place that embraces (and is inspired) by nature. Unfortunately, once I set about creating this space, I found that there aren't a lot of commercially available options for natural outdoor play equipment, or at least not economical ones. So, this led my husband and me to create an outdoor play space largely ourselves.

We were lucky that the sand area you see in these photos was already here when we bought this house. But, besides a crumbling old fence, there was nothing else. It was a blank slate!
 

Swings For Soaring
 
In my effort to avoid big, overly colorful and plastic play structures, we were led to build our own. I wanted, something simple, something classic.  Ready made brackets helped us with the process. Luckily they come in a soothing green tone, a color found in the natural word. Also, they are handy because you can make the swing set as tall and wide as you chose, and can customize it for your space. 

All of the commercially available swings I found were made of brightly colored plastic or rubber. Since I was trying to avoid that aesthetic, I decided to go a different route and use old fashion wooden swings.


I ordered these traditional wooden swings from here. It was the best price I could find for them. There are also some for sale on Etsy, or you could make them.


We also added extra length in the top cross beam of the swing set. This enabled us to add a rope on one side and a basic rope ladder on the other for climbing.

 
Create Hiding Places

Kids love to have places to hide, be alone and to experience their own sacred space. We created two small areas for them to escape, and be alone. The first was this ready made canvas teepee. It is made for indoors or outdoors, and so far it has held up well. I was fortunate, and found the teepee on a day that Amazon was offering it half price. It might be worth watching for sales, and building up your backyard playground slowly over time.


The second hideaway my husband build himself using scrap wood and old house parts. The base of it was actually one of our old kitchen cabinets left over from a remodel!


This little house could be a play area all on it's own! There are lots of extras to keep little ones entertained. On top there are 3 metal butterflies I found at the Dollar Store and spray painted with Rustoleum's Oil Rubbed Bronze paint (I love this stuff and use it all over the place!). On the front I hung a small wind chime, that has become "the doorbell." The side of the house holds a small shelf  with a real mailbox (an easy find at most hardware stores, check for sharp edges).


Inside the house I mounted a wooden box, to act as a shelf for trinkets and treasures. It's a leftover from a Melissa and Doug toy set. There is even a "peep hole" in the door! This was simple to do with a drill and wood bit. Unused cabinet pulls are mounted on the door for an added element of interest.

 
Logs To Climb On

When we took out an old hedge in the front yard, we noticed that many of the shrubs had usable logs. We saved them, and eventually I used them to create this small climbing structure.


First, I used three of the longer logs to make a pyramid shape. I attached them together with deck screws (and an electric drill). Then I used the longest three logs to make the horizontal bottom rung of each side. I worked my way up to the top of the pyramid using shorter and shorter logs, essentially creating a 3 sided ladder. Finally I added vertical crosspieces for extra strength.


Lastly we trimmed off any extra length, checked for sharp screw points sticking out, and used an electric sander to round off sharp edges.


In my continuing quest to use natural materials, I also decided to utilize the pieces of an old tree that someone had left at the bottom of our yard. 


I was fortunate to have these logs just lying around. But you could also contact a tree service company and ask them for spare parts, or keep an eye (and ear) out for anyone doing tree work in your neighborhood. I dug down into the sand about a foot and buried each log, being careful to keep the tops level. This created a raised stepping area. It is great for building balance and coordination!


With another log, I created a wooden ramp for balancing. I simply laid the log on its side and used two old boards to create the balancing/walking surface. 


Using an electric drill and deck screws, it was simple to attach the boards to the log to create an incline on both sides.


Add a Place for Art

After growing tired of having sidewalk chalk drawings on every single surface in our yard, I decided we needed a dedicated drawing space!


This chalkboard was simple to make. First, we had a piece of sheet metal cut at the hardware store. Then I used some of the leftover chalkboard paint from our kitchen re-do and painted several layers directly onto the metal. Because the edges were very sharp, my husband used some old boards we had laying around to create a frame for the chalkboard.


Lastly, we mounted it onto the fence (at child height) and added a hook and bucket for holding the chalk. Once it starts raining I'll probably take the bucket down, but you could also drill some small holes in the bottom for drainage. 


Loose Parts Play

To encourage creative play, I gathered interesting objects from nature and from around our house.


Whenever we find an interesting piece of something from nature, I add it to our collection. We have pieces of shells, rocks, iridescent abalone shells, glittering geodes, pinecones, wood, bits of moss, and other interesting natural materials. Left to their own devices, kids will use these spare parts in all kinds of creative play. I like that loose parts don’t have a preset storyline that goes along with them. They can become anything the child imagines them to be.


A true nature play purist purest probably wouldn't have these trucks or small rubber figures in their collections. But, I find that they are also great catalysts for creative and imaginative play. I purchased these old metal Tonka trucks on eBay (the new ones are expensive, and have a lot of plastic parts). The toy dinosaurs were found for free on the side of the road. Hurray for free toys!


Digging in the dirt is fun and therapeutic (for adults too!). If you can, get sand or dirt, and provide tools for digging. Instead of ready made plastic sand toys, look for interesting kitchen items, and gardening tools. These sand toys are kept nearby in wooden baskets. They drain easily, and are readily available for a couple of dollars at most secondhand stores. Over time I’ve eventually replaced most of our plastic sand toys with actual kitchen tools and gadgets, all found at thrift stores. The Goodwill always seems to have a good supply of wooden spoons and wooden baskets!

I found the child sized rake and broom at a nursery. Or you can purchase a similar set like this. Real gardening tools, like the hand trowel pictured below, are also preferable to the flimsy plastic children’s versions. 


Add Growing Green Things

Part of the magic of outdoor play is being amongst growing things and nature. Wherever possible, add (non toxic) plantings. 


One side of our sand area is dedicated to plantings. A redwood bark path wanders through a small garden, and over a wooden bridge. This area is meant to be child friendly and inviting. Over time the plants have been filling in and it is even more intriguing now.


I was also happy to discover that there was good soil buried about a foot under the sand in our yard. Because of this, I was able to plant a winter flowering Witch Hazel tree directly into the corner of the sandbox. Because it blooms in late winter it serves as a nice reminder for when spring is on it’s way.

Also pictured above, is the one piece of plastic play equipment that we have. It is a Craigslist plastic slide. I simply couldn’t figure out an alternative slide material other than plastic. So, I spray painted it in a natural tan tone. Originally it was a loud obnoxious color. I'm still searching for a good natural material slide option!


We are also so fortunate to have this large majestic Live Oak tree towering over our play area. Its twisting branches provide shade, and are home to animals such as birds and squirrels. We love watching them go about their days. It even provides us with an endless supply of acorns for creative play!

 
Add Mystery and Wonder

In addition to play equipment, carefully placed garden trinkets can add wonder to our play space.


I bought the quirky red birdhouse from this Etsy seller. We left one of the fence posts long, and mounted the birdhouse high above the play area.


A hook meant for hanging plants holds a bird feeder and wind chimes. We love to fill the feeder with peanuts, and watch the squirrels and blue jays quickly devour them. The wind chimes provide a magical auditory element.

A big part of incorporating nature is embracing it's creatures. We love to feed all the critters who live in our yard, and we recently added this squirrel feeder (similar). It's so much fun to watch them gnaw at it and then scamper along the fences!


My local hardware store carries these dried corncobs, but you could also check for them at feed stores or online. They go pretty fast so it's worth shopping around for the best price!

Another way to inspire awe and wonder is with plantings. Look for unique and interesting plants, like this curly grass.


Kids love to hide under bushes, climb trees and duck behind plumes of large grass. So visit your local nursery to see what is interesting and best suited to your climate. I always try to choose drought tolerant perennials. My preference is for plants that can withstand winter frosts and summer water rationing. 

Also, see my blog post about exciting day glow plants for more inspiration in this area.

 
Ready Made Elements

Sometimes it's just more practical to buy things pre-made for your outdoor play space. But, they need not be made of unsightly plastic. In the lower section of our yard we've added two readily available things that are very attractive to children and harmonious with nature.


The first is a simple hammock. It's surprising what a child-magnet this thing is! You can hang one between two trees, or with a hammock stand like I did. Just be sure that your hammock is the right length for your stand, they are not all standard sizes. 


Next, we added a classic dome shaped climbing structure. This particular model was not expensive and it's very sturdy. Assembly was a little tricky however. It took two adults several hours. But the payoff has been well worth it!


The dome is the perfect size for my 6 year old, and my 3 year olds are starting to get the hang of it. This structure also lends itself well to open ended creative play. It can be anything they can imagine it to be. One day it's a castle, the next it's a spaceship! Throw a sheet over the top and it makes a great tent!

We also have a fairy garden. For many more details, see my other blog post on the topic.  Lastly, if you're short on yard space, then you might be interested in my other post about creating a play area in a tiny yard here: Small Yard Outdoor Play.

That's all! Thanks for stopping by, and have fun playing!

From Shelley:

Thank you Hayley for all of your wonderful ideas and for sharing them with us! You can learn more from Hayley on her blog: Leaving the Ivory Tower.